


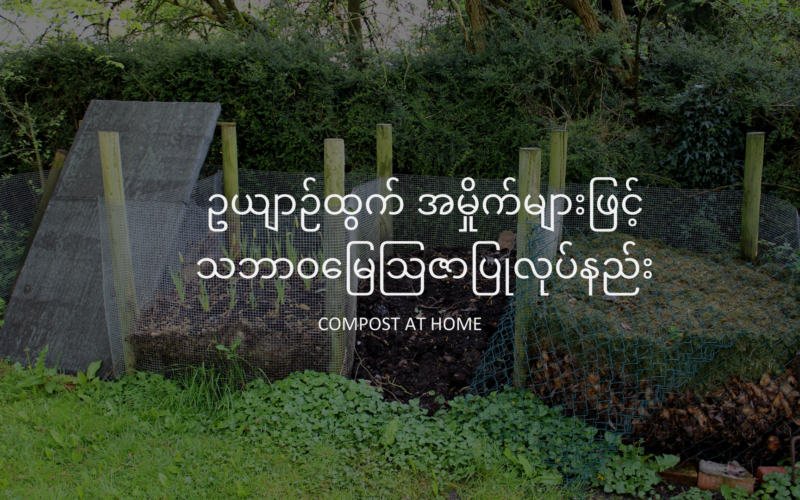
Garden Waste: Wire Bin Composting
Garden Waste: Wire Bin Composting
Leaves that fall in spring are usually burned down or end up in normal bins mixed with general waste. Leaves and garden waste are the special presents given by nature to fertilise the garden. There are various composting methods around us – holding units, turning units, worm composting, piling composting, etc. Composting is the natural biological process of decomposing organic materials such as leaves grass clippings, trimming, and food wastes. However, the wire composting bin method is the most successful and efficient way to practice in our backyard. Yard/garden waste can be turned into compost/fertilizers for soil amendments in your plants.
Materials:
- 1 inch of chicken wire/fencing wire with 6-ft length, 6 ft tall
- Wire cutters
- Boots
- Wire
- Spaces for composting
- Wood stands as a support frame
Tools
- Hammer (for chicken wire bin only)
- Metal tile (for hardware cloth bin only)
- Work gloves
- Plyers
Construction Details
- Form the length of wire fencing into a circle. Laying the fencing on the ground, opening it up, and walking back and forth over it a few times will flatten it enough for you to be able to form it into a circle.
- Bind the ends of the chicken wire together with the wire ties using plyers. Fasten the ends of the fencing together. You can use wire or twine to fasten it. To be sure that your compost bin is secure, fasten the ends at the top, middle, and bottom.
- Space wood or metal posts along the inside of the chicken wire circle. Holding the posts tightly against the wire, pound them firmly into the ground to provide support.
- Put your compost bin in a place where sunlight is exposed. The best place for a compost bin is near the garden, where it will be easy to put garden waste into the bin, as well as put finished compost into the garden.
- Start filling the compost bin. Lawn and garden waste, vegetable and fruit scraps, coffee grounds, tea bags, and eggshells are all great additions to the compost pile. You can also use it to hold chopped fall leaves to make leaf mould.
- Turn your compost regularly, or just let it sit until the materials break down. You can use finished compost anywhere in your garden, on your lawn, and in potted plants.
Step by Step Instructions
(Green materials are green leaves, grass, vegetables, spoil fruits, etc. The Brown materials dry leaves, bread, hairs, papers, ashes, sawdust, etc.)
Step 1: Collect all scraps and garden wastes
Step 2: Deliver the materials to the location of the composting and set up a compost pile
Step 3: Begin setting up the compost pile add dry light brown leaves and dry materials from the garden and put it first. If you do not have it then just add some dry garden soil or any existing compost soil, to begin with. Make sure larger pieces are chopped or shredded.
Step 4: Next is putting the green materials that are high in nitrogen and can be used to activate the heating process in your compost. Fruit’s vegetables, leaves, coffee grounds, and manure etc. all can be added at this stage or the so-called second layer of the compost yard. Make sure that to place the same layer of materials as previous layers. It cannot add a large quantity at a time because there is required space for them to breathe and have enough oxygen and space and microbes to develop and decompose.
Step 5: Then, the layers must be balanced to decompose faster. It is as if patten of brown materials and green materials. It is a repeat cycle of like 6-7 layers of light brown to dark brown to green thin layers.
Step 6: Now, it needs to be covered the pile with general garden waste. Covering is important because compost piles can attract lots of insects and animals and generate a bad smells. For instance, considering it to cover with black cloth to rise up/the temperature which directly affects the microbial activities with the increase of nitrogen inside.
Step 7: Making sure that the compost pile is moist for the organic materials to break down easily. For example, to add water lightly and make sure that the pile is moisturized (20-30%) all the time, but it is not too wet nor too dry to create a balance.
Step 8: The main obligation is to turn the pile at least twice every month to mix the matter and try to bring out matter that are tied inside and do some tossing and turning.
Step 9: When the compost turns into a dark brown colour, and it no longer gets warm and can see that things are almost broken down and then you should stop putting more and finish it off. It usually takes 2-4 months to get it done and it depends on the volume of materials as well.
What To Add:
Kitchen Waste/Household Waste (မီးဖိုချောင်ထွက်/အိမ်တွင်းသုံးအမှိုက်များ)
Vegetable scraps/skins
Spoil vegetable and fruits
Bread
Fruit peels like orange rinds, banana and apple skins, tomatoes, and cucumber skins, onion skins,
Tea leaves
Coffee grounds/ Teabags
Eggshells
Corn stalks
Shredded papers
Human hair, Animal hair
Garden Waste (ဥယျာဉ်ထွက်အမှိုက်များ)
Plants & flowers
Dead Plants & flowers
Green Leaves/ Dry leaves
Yard Waste
Grass Clippings, Trimming
Chopped twigs/sticks/branches/pruning
Coconut leaves and brunches
Green Leaves/ Dry leaves
Weed/Grasses, lawn, and garden weeds
Straw and hay
Shrub pruning
Ashes
Sawdust
Seaweed and kelp
Chicken manure (no cat or dog)
Hedge clippings
Tree bark
Logs
Pond plants
What NOT to add and Why:
- Oil foods (take time to decompose)
- Packaging materials (will not be able to depreciate)
- Cigarette butts (cannot be able to spoil)
- Plastics bag (hard to decay)
- Bones (can attract to insects and pets)
- Leftover (can produce smell and odors)
- Cat or dog excrement
- Meat and fish
- Dairy Products
- Disposable napkins
- Hard objects
- Clothes
Latest News
-

World Environment Day 2025
In celebration of World Environment Day 2025 under
-

Community Coming Together - Sharing and Supporting as One
In late March, a powerful earthquake struck near S
-

Myanmar-European Empowerment Programme (MEETup) Youths in Action
Under the Myanmar-European Empowerment Programme (
-

Waste Management in Bago Monastic Education; Pan Pyo Lat
Prevent Plastics Myanmar, in collaboration with Th
-

Mantas & Mobula Rays Talk by Myanmar Ocean Project
The Myanmar Ocean Project and Goethe-Institut Myan
This website was created and maintained with the financial support of the European Union. Its contents are the sole responsibility of the Prevent Plastics project and do not necessarily reflect the views of the European Union.
©2026 Prevent Plastics+. Developed by


This website was created and maintained with the financial support of the European Union. Its contents are the sole responsibility of the Prevent Plastics+ project and do not necessarily reflect the views of the European Union.
©2026 Prevent Plastics+. Developed by